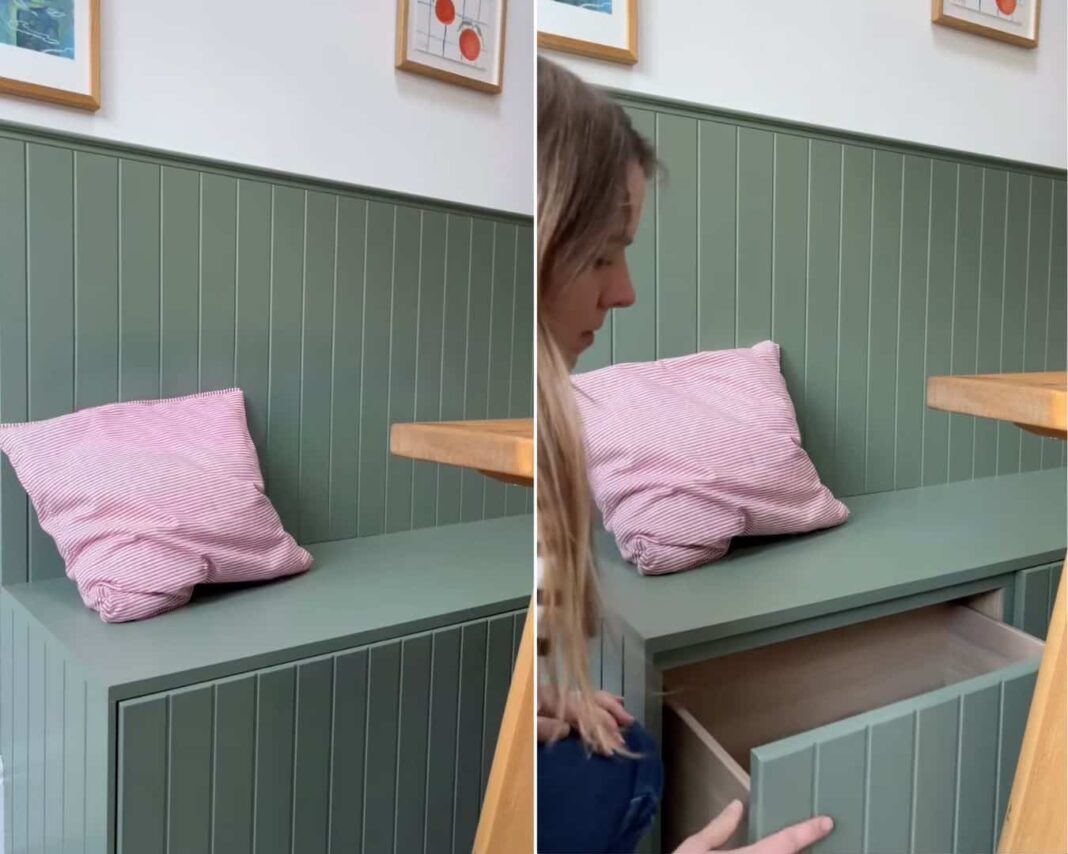
Now and then, I see a hack that I love so much I start trying to figure out where we could make it work in our home. This storage dining bench made from IKEA BESTÅ pieces and the IKEA SUTTERVIKEN drawer fronts is an example.
Unfortunately, my home has no place for a dining storage bench like this, but if it did, I’d be rolling up my sleeves and getting to work.
The creative mind behind this hack is Henrietta (@ladybayhome). Henrietta says, “We wanted to create a more comfortable dining area for our growing family, and we also desperately needed some more storage!”
And she makes it look easy.
A little DIY know-how helps, and Henrietta suggests using the BESTÅ planner tool on the IKEA website to plan things out.
She mentions that the trickiest part was getting all the measurements correct and making sure things were level. But, their new bench has made their dining space work much better for their family, providing extra storage and a comfy place to sit in the kitchen.
What You Will Need
- 3 x IKEA BESTÅ frames (23 ⅝” x 15 ¾” x 50 ⅜ “)
- 3 x IKEA BESTÅ drawer frames (23 ⅝” x 9 ⅞” x 15 ¾”)
- 3 x IKEA BESTÅ push-open drawer runners
- 3 x IKEA SUTTERVIKEN drawer fronts
- 1 Large sheet of 18mm MDF
- Made to measure V-groove paneling
- Timber battens
- Angle brackets
- Wood screws
- 1 piece of pine molding
- Drill/screw gun
- Level
- Adhesive (like No More Nails)
- Caulk
- Saw
- Primer
- Eggshell paint
- Paint roller and paintbrushes
BESTÅ Makes the Best Stylish Dining Storage Bench
1. Assemble the IKEA units
Put together all of the BESTÅ units, including the frames, drawer runners, and drawer frames. Follow IKEA’s instructions for everything, and attach the drawer fronts.
2. Build the Base
Measure out where you want the bench and map out the base. Use the timber, angle brackets, and wood screws to build a ladder-style frame.
Screw the base into your baseboard to add extra stability. Attach another piece of wood to the wall behind where the bench will go to secure the bench when you’re done.
3. Secure the BESTÅ Frames in Place
Secure the BESTÅ units together with screws to create one long piece. Then, attach them to the base frame and the wood brace on the wall.
4. Add the Bench Seat
Cut the sheet of MDF to size so it goes across the top of the BESTÅ pieces. Attach the MDF using your adhesive of choice.
5. Fit and Attach the Paneling and Molding
Fit the made-to-measure paneling to the sides and top of the bench. Then do a piece for the wall behind the bench, adding the molding along the top to get a built-in look. Use the adhesive to attach.
6. Caulk, Prep, and Paint
Use caulk to fill any gaps and create a seamless look. Prime the whole bench. Henrietta used Zinsser BIN primer, which she said came highly recommended. She also let the primer dry for a couple of days before applying paint.
She ended up using three coats of eggshell paint, applying it with a roller and a brush for a smooth finish. Before using the bench, she waited a few days to give the paint time to cure and limit the chances of chips.
How Much Does This Hack Cost?
All in all, this project cost Henrietta about $550 for everything. It might seem pricey, but as Henrietta points out, it would be much more expensive to have something custom-made. She also suggested there are ways to save a bit, for example, different types of paint or paneling.
Does This Hack Take a Long Time?
Henrietta was creating this beautiful bench while juggling the busy Christmas holidays and chasing after her toddler. Therefore, she worked on the bench in one to two-hour chunks as she could snag some time. It took her a few weeks, but depending on your schedule, it could take you a lot less time than that.
What do you think of this hack? Anything you’d change? The one thing I would likely tweak to personalize the hack is the paneling, only because it doesn’t match my home’s design aesthetic. But that’s not a problem, because IKEA offers all sorts of drawer front styles in case you prefer something more traditional or modern (just make sure to get the proper size).
Additionally, there are plenty of paneling options out there. You can also choose different colors to make it your own. Watch the hack, and follow Henrietta (@ladybayhome) on Instagram and TikTok to find more inspiring ideas and projects.
Don’t need a dining bench? How about a window seat with storage or an organized mudroom?
Have an IKEA hack you’re proud of? Share it with us and you might be featured next.

